I’m not great at finding time to play, and that’s been especially true lately with so many demands on my time. But as Julia Cameron talks about in “The Artist’s Way” it’s critical to take breaks, interact with the world and fill the inner well that fuels our creativity.
I thought about that last week when I took a class from Debra Hagen, a Nanoose Bay artist who specializes in mosaic art. I knew almost nothing about mosaics until I visited Debra at her house (okay, technically Team Sheltie went on a play date to visit Debra’s two shelties, Seamas and Merlin, and the humans accompanied them). Her home is vibrant, welcoming and filled with samples of her gorgeous mosaic art. 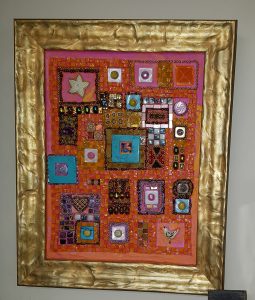
Every piece drew me in. Some were bold, others were more subtle, but they were all beautiful. When Debra said she gave classes in her studio downstairs, I was tempted, though I’m not at all artistic. I can’t draw, paint, or sculpt I told her. I’m lousy with textiles. I’d probably mess up papier-mache.
Debra assured me it didn’t matter, so I decided to make a trivet. Something bright for my new kitchen.
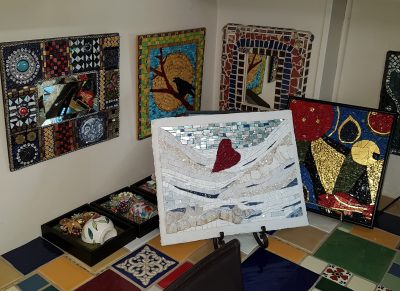
Debra’s studio overlooks the garden and it has the kind of happy vibe found in any creative space: a feeling of expectancy and a sense of promise. Plus, it’s filled with more of Debra’s stunning art.
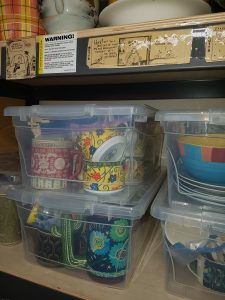
I enjoyed a cup of tea while Debra gave me a very brief introduction to mosaics. She pointed out her many containers of tesserae, the small blocks of stone, tile, glass or other materials used to make mosaics . . . and the pottery and china that can be broken up and also used in a mosaic. It’s referred to as pique assiette.

She talked about the substrate or rigid surface that you need to form the base, the adhesive or glue that’s used to attach the tesserae, and the basic tools like the wheeled nippers I’d need to do the job.
Like writing, the first step was settling on an idea and getting started. I quickly realized saying I was going to make a trivet was like saying I was going to write a novel. The statement was too broad. In the same way that a novel needs a plot or a character or a problem from which to build, my trivet needed something from which to build too: a central focus or a color or a piece of tile. Something. I decided on a heart for the center which Debra helped me outline on my plywood substrate.

We looked at the various bits of red tesserae that might work, but I wasn’t hooked. My eye kept going back to the china and pottery.
I found a plate with colors and a pattern I quite liked. Though it wasn’t at all red or heart-themed, something told me to go with it. I began breaking it up.

I hadn’t consciously noticed the couple on the plate when I chose it, but as I began to play with my layout, I decided they would form the center of the heart. How could they not?

Because I wanted to be sure I was happy with my layout, I placed many of the pieces on my substrate before I began gluing. That made for a longer process but I felt more confident doing it that way. At the end of the day, I wasn’t finished, but my heart had taken shape and I was thinking about background colors which I’ll tackle next time. 
Once the background tesserae is glued down, those small pieces will need 48 hours to dry before it’s time for the final step: grouting.
I left Debra’s studio feeling refreshed and energized . . . and thinking about my next mosaic project!
Debra is a great teacher. She’s instructive and helpful, and at the same time she’s wise enough to step back and let the artistic process unfold. For more information on her classes or to buy one of her mosaics, she can be reached at go************@***il.com

Wow, what a great new way to explore your creativity. Glad to hear you and team Sheltie are making new playmates.
We’re happy about that too, Alice!
What a grand idea! I’m sure you felt refreshed!
I did, Jodie, and I’m back in a few days to finish it off!